Tag: How To

  • HOW TO – MAKE THE PERFECT GIFT BASKET

    HOW TO – MAKE THE PERFECT GIFT BASKET

    One of my childhood friends was having a tea for her bridal shower… after settling on a Betsey Johnson New York crocheted navy and pink frock and hot pink ruched pointed toe pumps, I decided to shop for her {coordinating} pink gift.  I figured that with Easter right around the corner… a bridal basket would be right on point.  What bride-to-be wouldn’t love some pink kitchen accessories, killer cupcake mix (with the perfect pearl topping!), and some gourmet truffles to eat while she bakes?  A simple gift basket how-to is below.


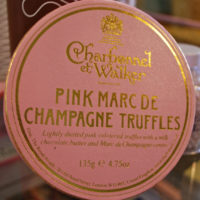
    1. Gather all materials… basket, tissue paper, ribbon, any other accessories, and the gifts.  For the gifts, try to stick with some kind of a theme (here the theme was twofold: pink and cupcakes)… All these gorgeous goodies are from Williams-Sonoma. 2. The adorable edible sugar pearls that are ideal for chic cupcakes. 3. Yum. Chocolate + champagne + pink + gold leaf = p.e.r.f.e.c.t.i.o.n. 4. Tie your ribbon around the basket and line the bottom of the basket with coordinating tissue paper that is all bunched up. 5./6. The final basket… with tiny faux flowers in the corner for a sweet touch. ♥
  • HOW TO – MAKE YOUR OWN CARDS

    HOW TO – MAKE YOUR OWN CARDS

    I am a complete sucker when it comes to all things personalized.  I am also an utterly complete sucker for greeting cards.  Beyond this, I am an utterly completely ridiculous sucker for receiving a personalized (ie homemade) greeting card for no reason at all.  Those that know me know my obsession with one-of-a-kind gifts… accompany the gift with one of these one-of-a-kind-made-by-fabulous-little-you cards.


    1. Layout all of your supplies.  I love to use things I already have. Some leftover paper from Valentine’s Day (seen here), linen paper used to make the menus for my sister’s surprise birthday party (seen here), stamps used to make place cards (seen here), and pearl details that were remnants from a wedding that I had designed (seen here).
    2. Get a great tool with which to cut straight edges. I swear by my Martha Stewart Simple Paper Trimmer (buy it here).
    3. Use your paper cutting handy dandy tool to trim your main paper (the card’s base) to the size that you want.
    4. Fold your base paper in half.
    5. Cut your secondary paper (use something flashy… you know you want to) to be a bit smaller than the folded portion of the front of your card.
    6. Adhere the secondary paper to the base paper using double stick tape (if you don’t already own some… buy some. now.).  Cut your third piece of paper to a slightly smaller size than your secondary paper.  I used linen paper (you know, the fancy resume kind)… I love the texture. So posh.
    7. Time for some stamping. Lay out the stamps on your paper before inking as a guide.  Don’t worry if you don’t stamp in a completely straight, perfectly spaced line. The charm is in the imperfections.
    8. See? Imperfect, but still darling.
    9. Add some of your own (charmingly imperfect) handwriting and a little embellishment if you feel like it. I did.
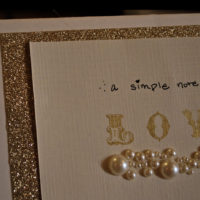
    10. Double stick tape (ah, yes. again.) your third piece of paper to your secondary, glitzy paper. There you have it. An adorable, made-by-you card.
    11. See again? Imperfections… crooked handwriting. Not every corner in place. Everything slightly off-center. That’s the best part.
    12. Line the inside with more luxe linen paper. With such an adorable card just keep the message short and sweet. It’s more than enough.
    13. Add a little more personalization on the back. You’re so crafty. And chic. And adorable. And perfect. That’s what the person that you give the card to will think. So, take a little time… let someone know they’re worth it to you.

  • HOW TO – ARRANGE FLOWERS

    HOW TO – ARRANGE FLOWERS

    There is nothing like having a fresh bunch of flowers in your home. On your desk. On a table. Anywhere.  Everywhere.  However, you don’t want those flowers to appear as if they have been haphazardly thrown into a vase.  Each and every flower should look like it is exactly where it is intended to be.  Here’s how…

    {You should have two pairs of cutting tools… One standard pair of scissors [make sure they are sharp!] and a smaller [very sharp!] pair of pruning shears.  Also, have a vase waiting filled 1/3 full of water}

    {Purchase flowers in a single hue… White is always fresh and looks classic.  Arranging buds in a single color takes less precision than a multi-colored arrangement… less room for error!}

    {Lay your flowers out on a clean and open surface and use your standard scissors to remove any wrapping and binding from the flowers}

    {Use your pruning shears [careful! they’re verrrry sharp!] to remove all leaves and thorns from flowers.  This results in a crisp looking flower arrangement.  Also, you never want leaves below the water level because they soak up too much water and then it doesn’t get to the bud}

    {Keep a bucket to catch all discarded greenery so you can dispose of it responsibly. Green waste! Compost!}

    {Cut all stems at a 45° angle… they soak up the water better that way. Also, cut the stem at a length where the head of the flower rests on the top of the vase}

    {Arrange the largest buds first.  They take up the most space and it’s easier to see where you can highlight your smaller [and usually more expensive!] buds}

    {Next… take your smaller flowers and fill in the gaps until the flower heads are tightly bunched}

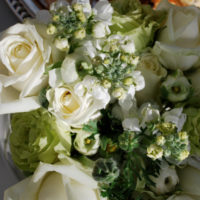
    {Voila! A completed arrangement… Aren’t the ranunculus to die for?}

  • How To: Achieve the Perfect Pout

    Hey there, beauties.  A lot of girls ask me about my lipstick (it’s MAC’s St. Germaine… if you were wondering).  However, I think it’s less about the lipstick and more about the application.  For a full, flirty mouth… follow my tips below.  Excuse the messy hair and the gray tank top… But that is how I look when I’m prepping to go out of the house.  And, though you can’t see them, I’m wearing super cute gray leopard print pj pants with a hot pink drawstring… I’m telling you that in defense of my at-home fashion.  I provided you with a step-by-step photo tutorial and a video tutorial (pick whichever one is more your learning style)!


    Step 1: Lay out your materials.  A liquid foundation, your favorite lipstick, a coordinating gloss, and a clear high shine gloss are necessary.

    Step 2: Do your makeup as usual, but apply the liquid foundation all over your face including your mouth.  This provides a foundation for the lipstick to adhere to and is so much more current than lipliner.

    Step 3: Choose your lipstick of the day.  I am a fan of having a signature shade that people associate me with.  Wear that shade 3-4 days a week so that it becomes (officially) your shade.

    Step 4: Apply your lipstick as you usually do, filling in your entire mouth.

    Step 5: Apply the coordinating gloss over your entire mouth.  The gloss does not need to be made by the same manufacturer of your lipstick, but the colors of the two should coordinate.

    Step 6: Apply the clear high shine gloss only to the very center of your lower lip and to your cupid’s bow (the point at the top of your mouth).  This provides you with shine where you want it, making your lips appear full.

    Step 7: Voila! A perfect pout.

    Step 8: Get out there and show off that sexy mouth, you glamazon you.

    If learning through a video is more your style, just click below. xoxo

    httpv://www.youtube.com/watch?v=4vR2Iu2BhKc