Category: How To

  • HOW TO – PACK FOR A WARM WEEKEND

    HOW TO – PACK FOR A WARM WEEKEND

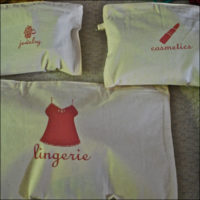
    Going away for a three-day weekend… especially someplace warm… is always something to look forward to.  Packing for it? Not so much.  There is very little about this article that is glamorous {except for the fact that I’m packing for a long weekend in Palm Springs}… but this is a practical skill you should master.  You’ll need outfits for the pool, daytime shopping/outings, nighttime dinners/going-out, working out {if you’re like me and view exercise as relaxing}, and sleeping.  Follow the step-by-step packing guide below and you’ll never feel overwhelmed by packing again {no need to stress before a vacation!}.

  • HOW TO – THE 5 MINUTE FACE & ADVANCED MAKEUP TECHNIQUES

    HOW TO – THE 5 MINUTE FACE & ADVANCED MAKEUP TECHNIQUES

    If your life is anything like mine… fabulous opportunities arise at the most unexpected times.  Though you would love to always be prepared, sometimes you will be caught off-guard {aka in your pajamas with no makeup on}.  Don’t let this stop you from taking part in the fabulous outing… if you have five minutes {trust me, any worthy individual extending the invite will wait for you, gorgeous} you can be ready to go.  Throw your hair up and remember, you only need a clean base {concealer, foundation, pressed powder}, a bit of shimmer {get a good multi-purpose color pot}, tinted loose powder {to set the look and give you a glow}, a bit of bronzer, a pop of color, and curled lashes {with a good coat of volumizing mascara}.  Read on for a how-to on your steps to achieve the 5-Minute Face.

    1. Bare faced… and have to be out the door in 5 minutes? 2. Put that concealer under your eyes . 3. Concealer? Check. Now pat it gently into your skin. 4. Liquid foundation. 5. Dot it on and rub it in. 6. Our base is done. 7. Pressed powder… Press it on for flawless coverage. 8. A two in one product to highlight eyes… 9. And cheeks. 10. Rub in some tinted loose powder with a kabuki brush. 11. Bronzer everywhere the sun hits… cheeks, forehead, nose, and chin. 12. Take the bronzer and use it with a contour brush to define cheekbones.  13. Hot. Pink. Blush. You need a pop of color. 14. Put that color on the apples of your cheeks. 15. Your eyelash curler (aka your best friend). 16. Volumizing mascara. 17. Bam. Less than 5 minutes. 18. Time to go out xo

    For the video version of the 5-Minute Face Tutorial, watch here
    httpv://www.youtube.com/watch?v=rlzdMfPGgNM

    If you’re ready to move on, lovebug… Let’s get on with some more advanced makeup techniques.  Let’s say you know you have somewhere fabulous to go {a hot date, a charity event, girls night…} and you have at least 20 minutes to get ready… advanced makeup techniques only add 15 minutes {max} onto your basic 5-Minute Face.  With the addition of eyeliner {pencil and liquid}, darker eyeshadow, fake lashes, an eyebrow pencil, and a nude lipstick, you’re ready to knock anyone’s socks off… and {though you are already perfect just the way you are} you’ll look like a total glamazon.


    1. You’ve already done your 5-Minute Face… now line the outer third of your lower lash line and inner rim with a black waterproof eyeliner pencil. 2. Voila! Instant drama. 3. Take a flat brush and rub it in light shimmery eyeshadow. 4. Pat the shadow on your lid and sweep it up to your browbone. 5. A wash of light shimmer. 6. Take an eyeshadow brush meant for your crease and sweep it in a chocolate brown shadow. 7. Sweep the shadow into your crease. 8. Back to the flat eyeshadow brush and the chocolate brown shadow.  9. Cover the outer half of your lid with the brown shadow. 10. Use a sponge tip applicator and sweep it in black shadow. 11. Put the black shadow on the outer third of your upper and lower lid. 12. Liquid liner… line your whole eye if you want a dramatic look. 13. Fill in those brows to look polished. 14. See? Polished. 15. One more coat of that volumizing mascara. 16. Fake eyelashes! Practice makes perfect. 17. The perfect nude lipstick. M.A.C.s “Hue.” 18. Smear that lipstick on. 19. The face… bring the drama. 20. The finished lids. 21. Advanced makeup… mastered.

    For the video version of the Advanced Makeup Tutorial, watch here
    httpv://www.youtube.com/watch?v=338G3WyKYRU
  • HOW TO – DECONSTRUCT & RECONSTRUCT A T-SHIRT

    HOW TO – DECONSTRUCT & RECONSTRUCT A T-SHIRT

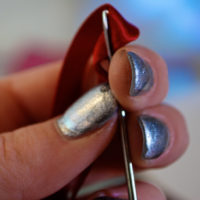
    I was headed to the Big Four… basically a huge metal music festival where Metallica, Slayer, Megadeth, and Anthrax would be playing… and I had no idea what to wear.  My man gave me one of his cherished Metallica T-Shirts and told me to do whatever I wanted with it.  Perfect.  With the assistance of an embroidery needle, a silver Sharpie, some awesomely sharp scissors, crimson ribbon, and a safety pin… I got exactly the Metallica shirt that I wanted.


    1. Gather your supplies… T-shirt. Silver Sharpie pen. Scissors. Ribbon. Etc. 2. The beginning T-shirt… Cute, but not quite the look I was going for. 3. My “Aha!” moment when I thought… “I can make over this shirt.” 4. Using the silver Sharpie to mark where to make the cuts.  5. Close up of the Sharpie markings. 6. I like this much better… a tank top! 7. No… I don’t. I can make it even better! 8. Cut a slit down the middle… yeahhhhh. 9. Love it. 10. Only loved it for .5 seconds… decided to cut up the sides.  11. Decided to re-stich the sides with some satin ribbon.  12. Stitching myself back up. 13. Happy! That’s what I wanted. 14. The finished product. I even added a metal-esque safety pin. Love.

  • HOW TO – MAKE THE PERFECT GIFT BASKET

    HOW TO – MAKE THE PERFECT GIFT BASKET

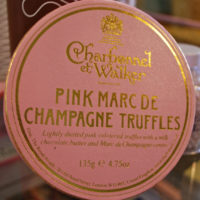
    One of my childhood friends was having a tea for her bridal shower… after settling on a Betsey Johnson New York crocheted navy and pink frock and hot pink ruched pointed toe pumps, I decided to shop for her {coordinating} pink gift.  I figured that with Easter right around the corner… a bridal basket would be right on point.  What bride-to-be wouldn’t love some pink kitchen accessories, killer cupcake mix (with the perfect pearl topping!), and some gourmet truffles to eat while she bakes?  A simple gift basket how-to is below.


    1. Gather all materials… basket, tissue paper, ribbon, any other accessories, and the gifts.  For the gifts, try to stick with some kind of a theme (here the theme was twofold: pink and cupcakes)… All these gorgeous goodies are from Williams-Sonoma. 2. The adorable edible sugar pearls that are ideal for chic cupcakes. 3. Yum. Chocolate + champagne + pink + gold leaf = p.e.r.f.e.c.t.i.o.n. 4. Tie your ribbon around the basket and line the bottom of the basket with coordinating tissue paper that is all bunched up. 5./6. The final basket… with tiny faux flowers in the corner for a sweet touch. ♥

  • HOW TO – TABLE & CHAIRS BEFORE & AFTER

    HOW TO – TABLE & CHAIRS BEFORE & AFTER

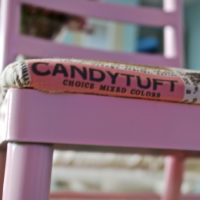
    I am a firm believer in seeing the best in people. And furniture.  I took a look at my late grandmother’s rusted chairs and a reclaimed wrought iron coffee table and decided that they weren’t quite my style… yet.  Some high gloss cotton candy pink spray paint, chic fabric, and a little creativity helped get me a few pieces of furniture that I utterly adore.

    1. The chair in its beginning state. Sad, I know. But so much potential! 2. The chair after being sanded, wiped down, and painted with a coat of primer. 3. The necessary tools. 4. Spray painting in action. 5. The beginning of quite a lovely little chair. 6. The fabric waiting to be adhered {with a staple gun} to the cushion. 7. Close up. 8. The adorable fabric. 9. Voila! The finished product.


    1. A very cool, but not quite “me” coffee table. 2. Giving the table one of its three coats of high gloss spray paint. 3. Yummy. 4. Beveled glass panels cleaned and replaced and a fresh vase of flowers. 5/6. Detail shots of my new {old} coffee table. I’m in love.

  • HOW TO – MAKE YOUR OWN CARDS

    HOW TO – MAKE YOUR OWN CARDS

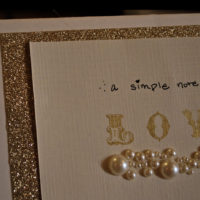
    I am a complete sucker when it comes to all things personalized.  I am also an utterly complete sucker for greeting cards.  Beyond this, I am an utterly completely ridiculous sucker for receiving a personalized (ie homemade) greeting card for no reason at all.  Those that know me know my obsession with one-of-a-kind gifts… accompany the gift with one of these one-of-a-kind-made-by-fabulous-little-you cards.


    1. Layout all of your supplies.  I love to use things I already have. Some leftover paper from Valentine’s Day (seen here), linen paper used to make the menus for my sister’s surprise birthday party (seen here), stamps used to make place cards (seen here), and pearl details that were remnants from a wedding that I had designed (seen here).
    2. Get a great tool with which to cut straight edges. I swear by my Martha Stewart Simple Paper Trimmer (buy it here).
    3. Use your paper cutting handy dandy tool to trim your main paper (the card’s base) to the size that you want.
    4. Fold your base paper in half.
    5. Cut your secondary paper (use something flashy… you know you want to) to be a bit smaller than the folded portion of the front of your card.
    6. Adhere the secondary paper to the base paper using double stick tape (if you don’t already own some… buy some. now.).  Cut your third piece of paper to a slightly smaller size than your secondary paper.  I used linen paper (you know, the fancy resume kind)… I love the texture. So posh.
    7. Time for some stamping. Lay out the stamps on your paper before inking as a guide.  Don’t worry if you don’t stamp in a completely straight, perfectly spaced line. The charm is in the imperfections.
    8. See? Imperfect, but still darling.
    9. Add some of your own (charmingly imperfect) handwriting and a little embellishment if you feel like it. I did.
    10. Double stick tape (ah, yes. again.) your third piece of paper to your secondary, glitzy paper. There you have it. An adorable, made-by-you card.
    11. See again? Imperfections… crooked handwriting. Not every corner in place. Everything slightly off-center. That’s the best part.
    12. Line the inside with more luxe linen paper. With such an adorable card just keep the message short and sweet. It’s more than enough.
    13. Add a little more personalization on the back. You’re so crafty. And chic. And adorable. And perfect. That’s what the person that you give the card to will think. So, take a little time… let someone know they’re worth it to you.