Category: Before & After

  • HOW TO – DECORATE A BOOKCASE

    HOW TO – DECORATE A BOOKCASE

    My bookcase has been a constant saga of reorganization and frustration {see here and here for the journey}… it was cute, but it wasn’t quite right.  So I decided to take a day and revamp the shelving decor.  Read on and you can learn how to take some ordinary shelving and make it something all your own.

    So, my bookcase was ooooookay {yawn}… but it wasn’t there yet.  I had already saved this bookcase from being sent to the dump {it used to be a horrible brown spotty wood color… I painted it glossy white and papered the back with a pink and white damask print}.  If it was worth saving, then it should be worth filling properly.  As I do with every design project for my company {if you’re curious about what I do, click here}, I start with an Inspiration Board {which is basically a collection of images that inspire me and helps collect my thoughts and direct my ultimate design vision}.


    *images courtesy of elements of style, the zhush, all things chic, and favim

    After looking at my Inspiration Board for design direction on my bookcase project, I started laying out all of my necessary decor items… namely books, framed photos, and miscellaneous knick-knacks/pretty things/sentimental items.

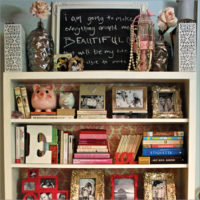
    The final step in the process is arranging all of the items so that they are aesthetically pleasing.  This involves a bit of trial and error and a lot of walking back and forth {so you can see what your arrangement looks like from different areas in the room}.  My final product {I am in love with it} looks like this…

  • HOW TO – DECONSTRUCT & RECONSTRUCT A T-SHIRT

    HOW TO – DECONSTRUCT & RECONSTRUCT A T-SHIRT

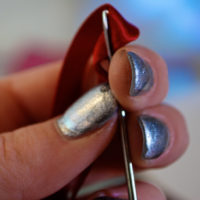
    I was headed to the Big Four… basically a huge metal music festival where Metallica, Slayer, Megadeth, and Anthrax would be playing… and I had no idea what to wear.  My man gave me one of his cherished Metallica T-Shirts and told me to do whatever I wanted with it.  Perfect.  With the assistance of an embroidery needle, a silver Sharpie, some awesomely sharp scissors, crimson ribbon, and a safety pin… I got exactly the Metallica shirt that I wanted.


    1. Gather your supplies… T-shirt. Silver Sharpie pen. Scissors. Ribbon. Etc. 2. The beginning T-shirt… Cute, but not quite the look I was going for. 3. My “Aha!” moment when I thought… “I can make over this shirt.” 4. Using the silver Sharpie to mark where to make the cuts.  5. Close up of the Sharpie markings. 6. I like this much better… a tank top! 7. No… I don’t. I can make it even better! 8. Cut a slit down the middle… yeahhhhh. 9. Love it. 10. Only loved it for .5 seconds… decided to cut up the sides.  11. Decided to re-stich the sides with some satin ribbon.  12. Stitching myself back up. 13. Happy! That’s what I wanted. 14. The finished product. I even added a metal-esque safety pin. Love.

  • HOW TO – 70s CLUB CHAIRS BEFORE & AFTER

    HOW TO – 70s CLUB CHAIRS BEFORE & AFTER

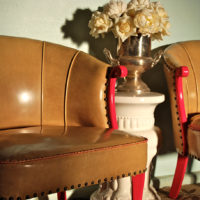
    I decided to continue on my DIY journey… and I took some 70’s club chairs (complete with chipped wood and torn fabric) from one of my friends who was going to just toss them {only aghast… because… as stated in an earlier post: “I see the best in people. And furniture.”}… I saw so much potential here.  Good bones… Just in need of a little TLC.  With the help of some fine grain sandpaper, clorox bleach wipes (always disinfect reclaimed furniture), hot pink high-gloss paint (Disney’s “Invitation to a Princess”… I died.), and some thick pink embroidery thread… my new “Cocktail Corner” (pics to come soon) was one step closer to completion.


    1. The original chair. Cracked, torn… so much potential. 2. Putting in the work… First rub sandpaper over all wooden components and then paint (4 coats!) on all of it. 3. Bam! Hot pink! 4. Embroidery thread (it’s strong stuff) and very thick needles… They have to be able to pierce through the thick material… I had to use a hammer to get the nail through. 5. Cocktail Corner is coming along. 6./7. Detail shots. Love the brass studs and the perfectly imperfect stitching.

  • HOW TO – TABLE & CHAIRS BEFORE & AFTER

    HOW TO – TABLE & CHAIRS BEFORE & AFTER

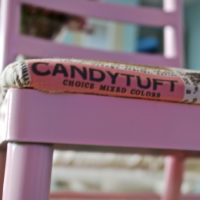
    I am a firm believer in seeing the best in people. And furniture.  I took a look at my late grandmother’s rusted chairs and a reclaimed wrought iron coffee table and decided that they weren’t quite my style… yet.  Some high gloss cotton candy pink spray paint, chic fabric, and a little creativity helped get me a few pieces of furniture that I utterly adore.

    1. The chair in its beginning state. Sad, I know. But so much potential! 2. The chair after being sanded, wiped down, and painted with a coat of primer. 3. The necessary tools. 4. Spray painting in action. 5. The beginning of quite a lovely little chair. 6. The fabric waiting to be adhered {with a staple gun} to the cushion. 7. Close up. 8. The adorable fabric. 9. Voila! The finished product.


    1. A very cool, but not quite “me” coffee table. 2. Giving the table one of its three coats of high gloss spray paint. 3. Yummy. 4. Beveled glass panels cleaned and replaced and a fresh vase of flowers. 5/6. Detail shots of my new {old} coffee table. I’m in love.